
Time Nomad User Guide 🚀
Welcome to Time Nomad! Your journey to effortless time tracking and practice management starts here. We're so excited to help you regain control of your time!
This guide will walk you through everything you need to know, from your very first login to becoming a productivity pro.
Table of Contents
- Getting Started
- Your Dashboard
- IDE Extension
- Project Planner
- Managing Clients
- Invoicing
- Notifications
- Settings
- Data Export
- Referral Program
- Pro Features
- Ticket Integrations
Getting Started
The Landing Page
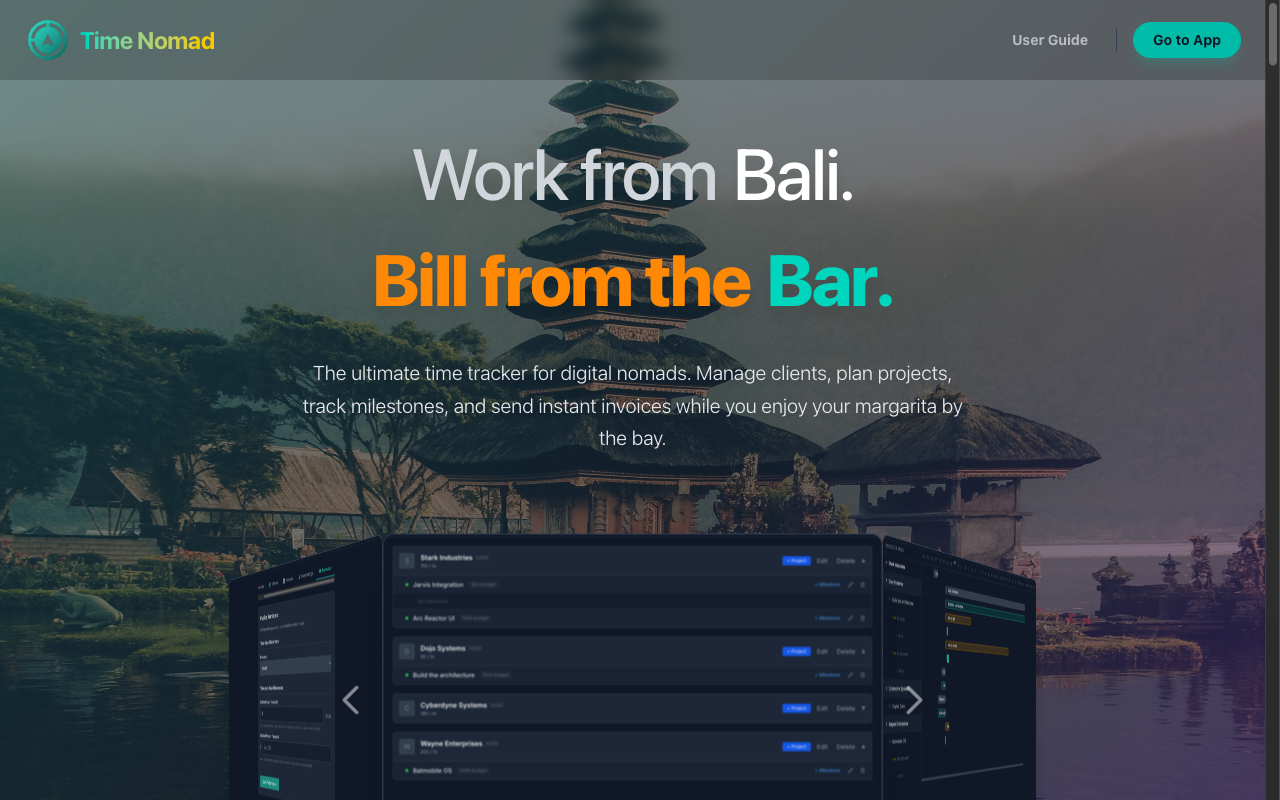
Welcome to the home of your new productive life! The Landing Page is where it all begins. Here you'll find everything you need to know about why Time Nomad is the perfect companion for your digital nomad lifestyle.
Key Features:
- Dynamic Inspiration: Check out the header! It cycles through dream locations like Bali and Lisbon and workplaces like Poolside and Cafe. It's a little reminder of why you do what you do.
- Feature Highlights: Scroll down to see exactly how we help you with Visual Project Planning, Intelligent Invoicing, and keeping your data Secure & Portable.
- Client Experience Preview: We show you exactly what your clients will see—professional invoices and smooth payment options. Impress them before you even start working!
Ready to jump in?
Click the big, beautiful "Start Your Journey" button. You can sign in using your favorite social account (Google, Apple, etc.) or just use your email. It's quick, secure, and gets you straight to the good stuff.
Your Dashboard
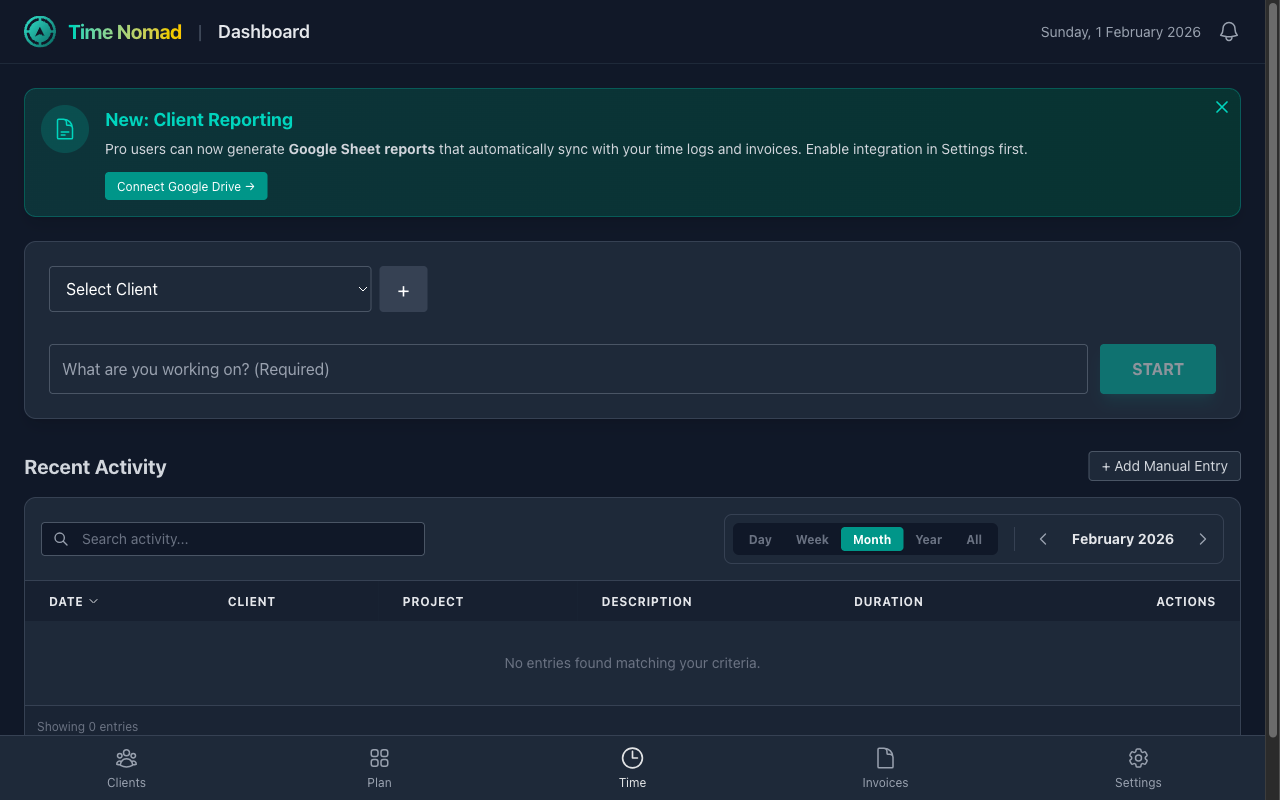
Your Dashboard is mission control. It’s designed to answer one question: "What am I achieving right now?"
Your Command Center
The Dashboard is the first screen you'll see. It's designed for speed and clarity, giving you immediate access to your current work and recent history.
1. The Time Tracker
At the heart of Time Nomad is the tracker. You have two main states:
Ready to Track
When no timer is running, you can quickly set up your next task.
- Select Client: Choose from your existing clients or click
+to quick-add a new one instantly. - Select Project: (Optional) Filter by project to keep your data organized.
- Select Milestone: (Optional) Tie your work to specific deliverables.
- Add Description: Type a brief note about what you're working on (e.g., "Homepage Design"). You can even add links to keep your workspace organized (see below).
Once you've filled in the details, the START button will light up.

Tracking Time
Once you hit START, the dashboard transforms into focus mode.
- Elapsed Time: clearly visible at the top.
- Context: Shows exactly what Client, Project, and Milestone you are billing for.
- Budget Bar: If your project has a set budget (e.g., 20 hours), a progress bar will appear to warn you if you're getting close to the limit.
- Stop: Hit the large red button to end the session and save the entry to your history.
Rich Text & Links
Make your logs more useful by adding links directly to your descriptions.
- Link to Tickets: Working on a Jira or Linear task? Paste the link in the description.
- Link to Pages: Working on a specific URL? Link to it so you can jump back later.
- How to Add Links:
- Keyboard Shortcut: Highlight text and press
Cmd+K(Mac) orCtrl+K(Windows). - Context Menu: Highlight text and Right Click to select "Add Link".
- Keyboard Shortcut: Highlight text and press
2. Manual Entry
Forgot to start the timer? No problem. Click the + Add Manual Entry button above your recent activity list.
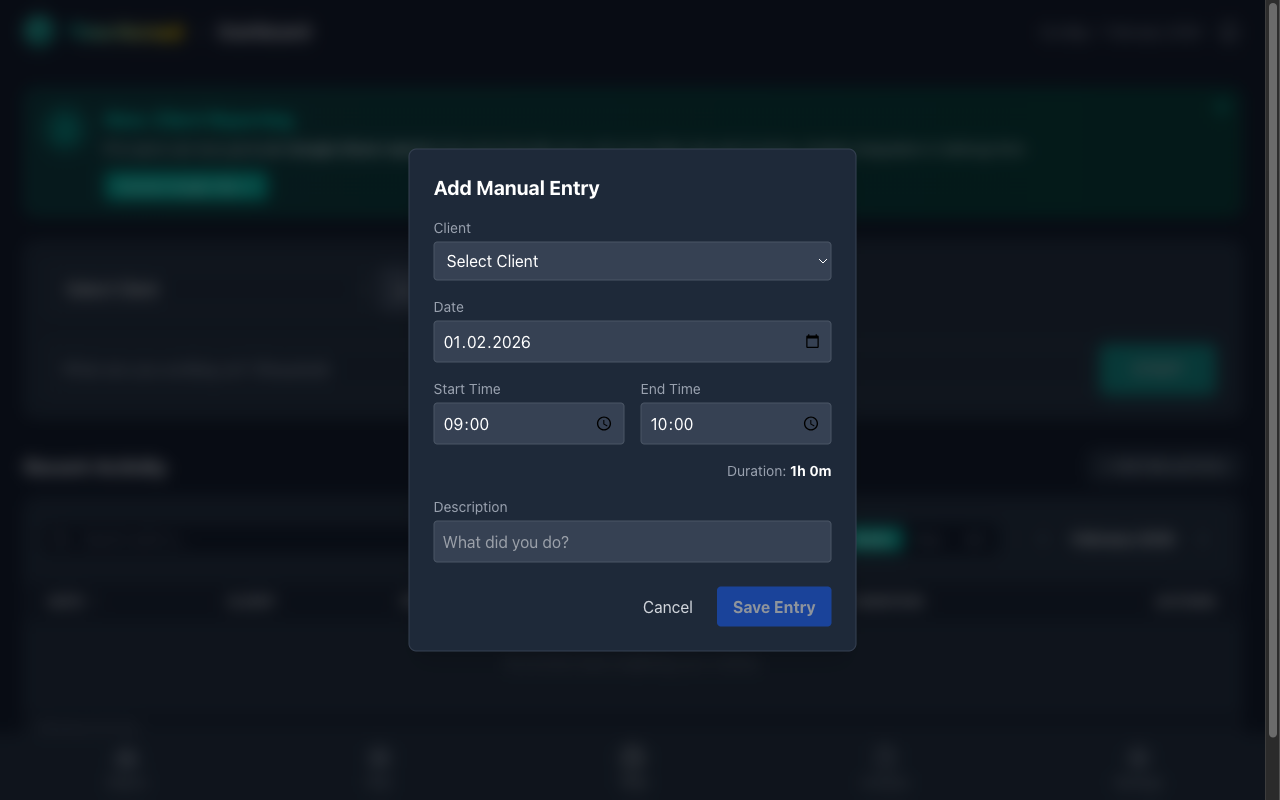
This opens a dedicated modal where you can:
- Select the Client/Project/Milestone.
- Enter the Start Time and End Time (or Duration).
- Add a description (including links using the
Cmd+Kshortcut). - Backdate entries if you need to log work from yesterday.
3. Recent Activity
Below the tracker, you'll see a live feed of your Recent Activity.
- Edit on the fly: Clicking an entry opens the Edit Modal. Here you can correct individual entries, update their duration, or add/edit links in the description.
- Quick View: Immediately see how much time you've tracked today.
IDE Extension
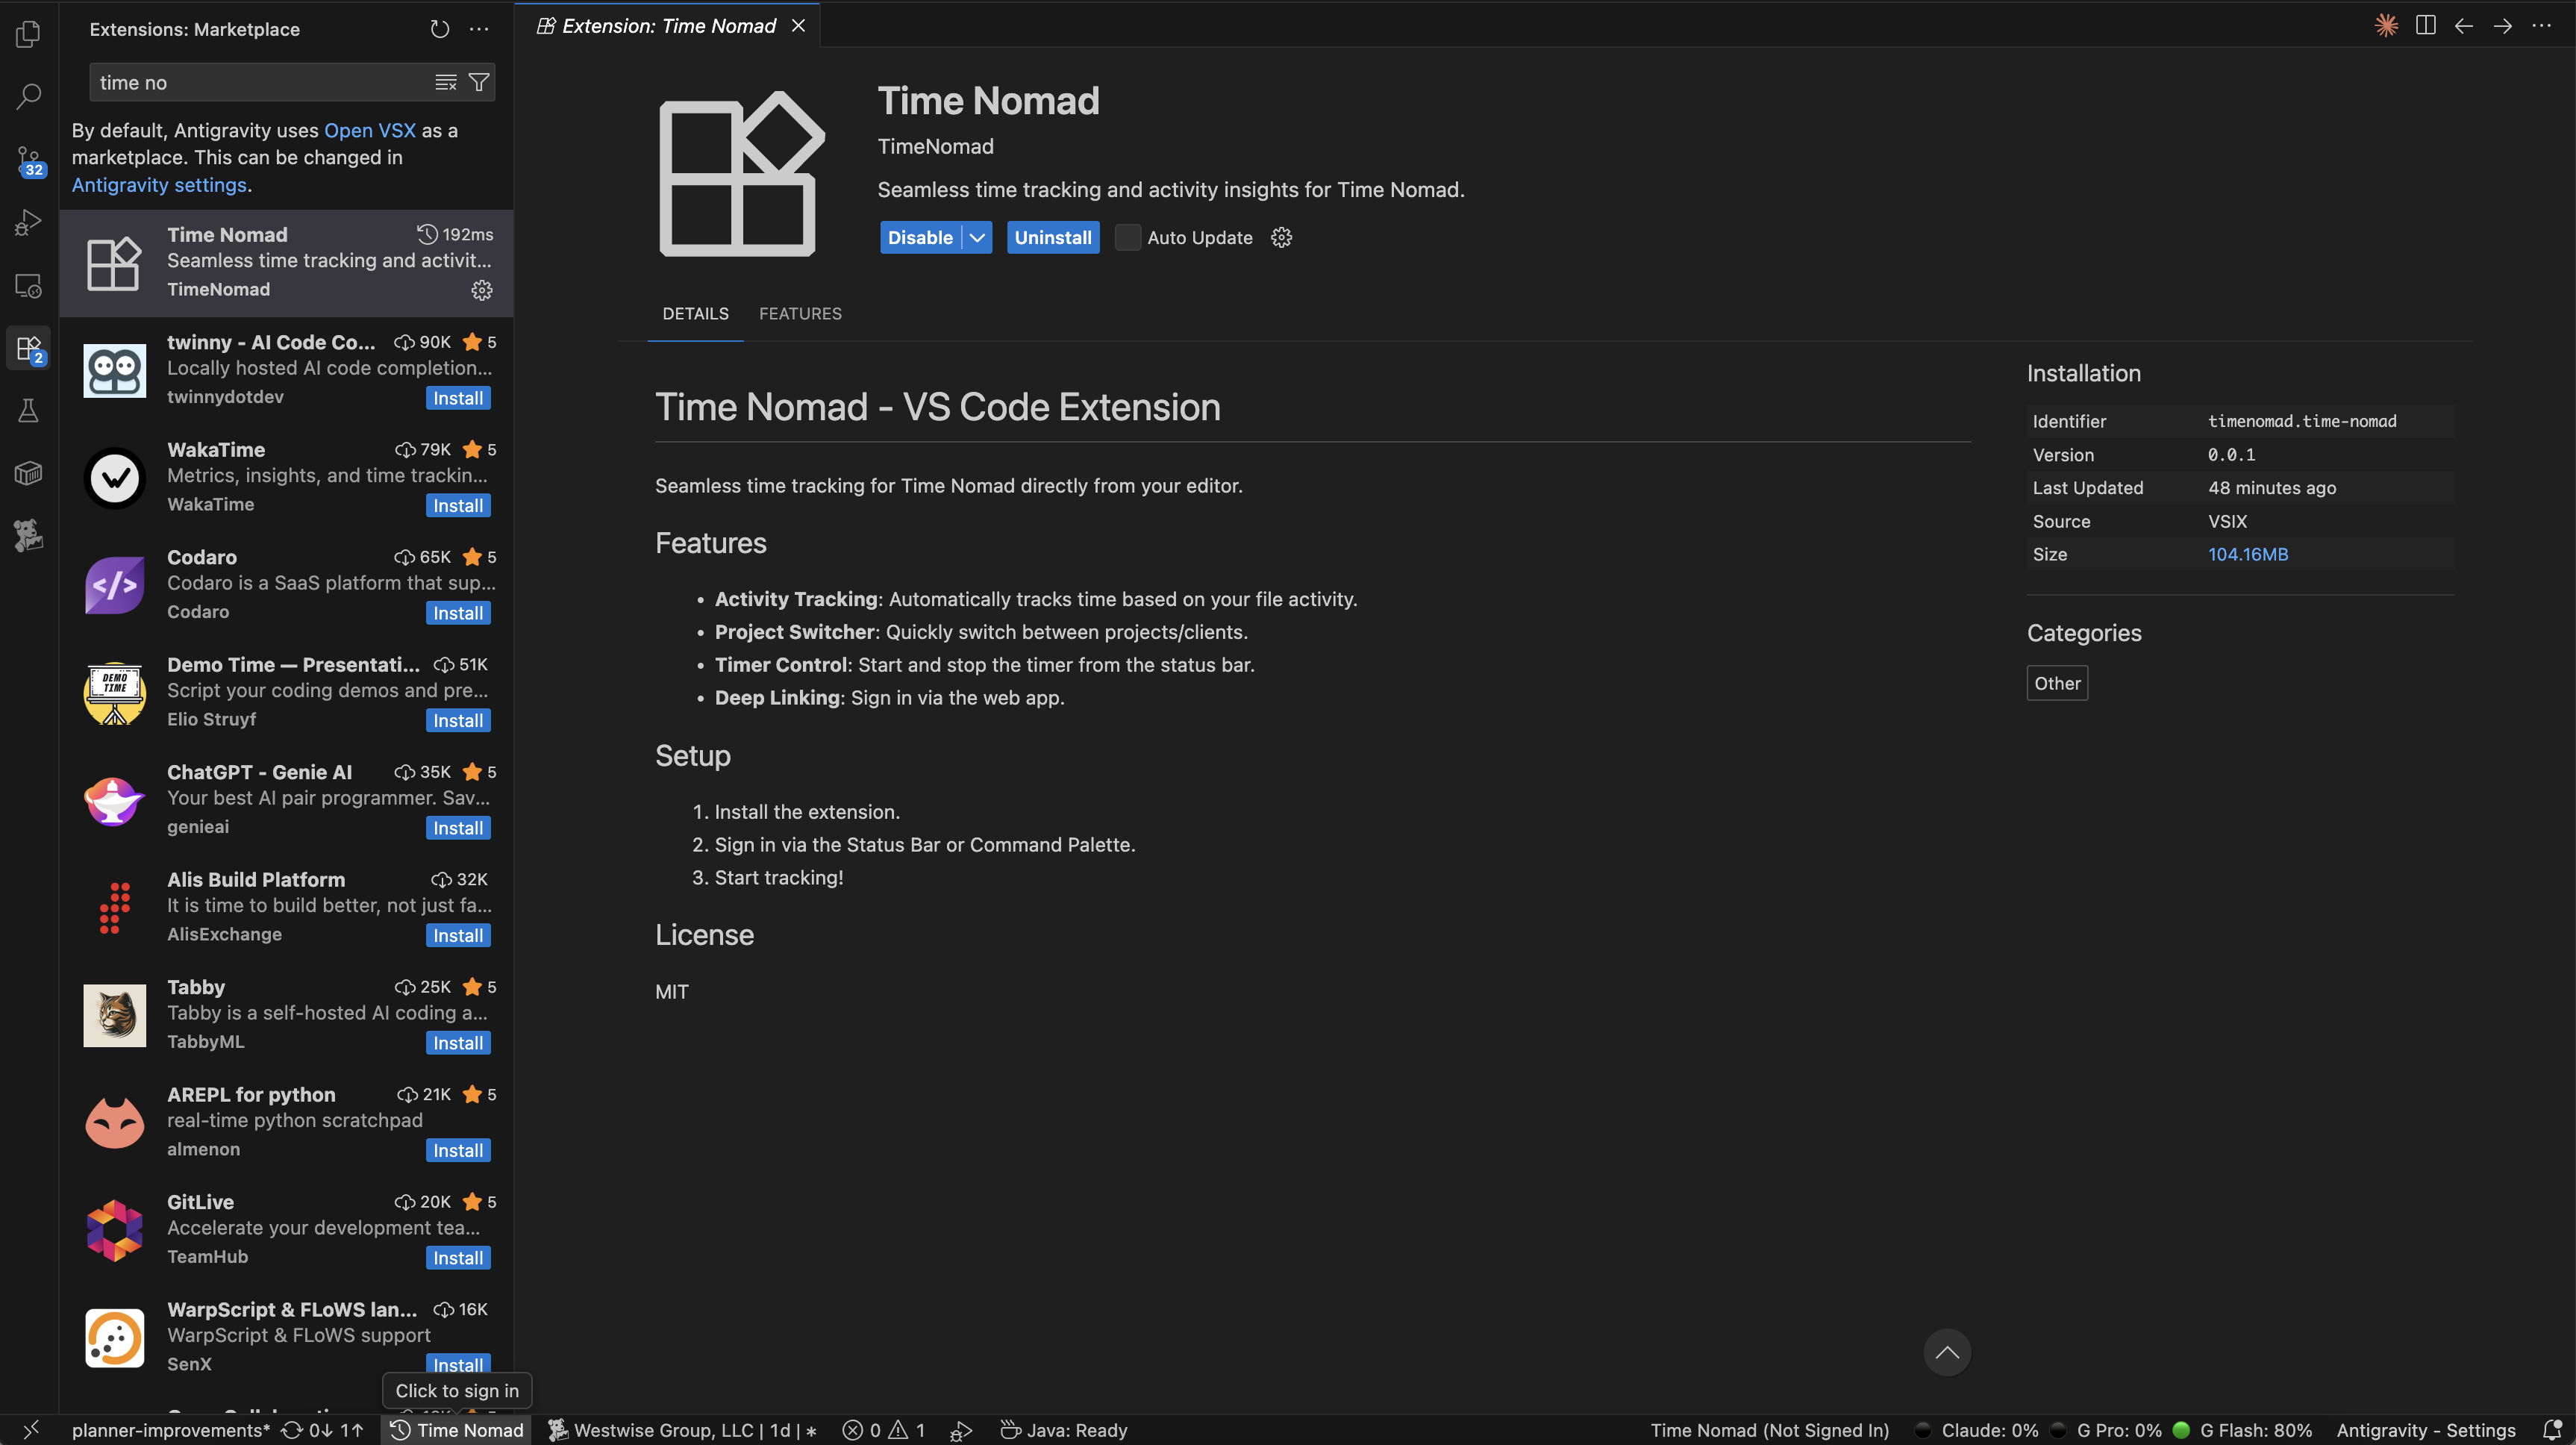
Stay in your flow. The Time Nomad IDE Extension brings powerful time tracking directly into VS Code, Cursor, and Windsurf.
Key Features
- Status Bar Timer: Start, stop, and switch projects without leaving your code.
- Auto-Tracking: We automatically log which files and languages you're working on.
- Context Switching: Changing your branch? We'll track that too.
1. Installation
You can install the extension from your preferred marketplace or manually.
Option 1: VS Code Marketplace (Recommended)
The easiest way to install and get auto-updates.
- Open Extensions in VS Code (
Cmd+Shift+X). - Search for
Time Nomad. - Click Install.
View on Marketplace
Option 2: Open VSX Registry
For VSCodium and other open-source editors.
- Open your editor's extension manager.
- Search for
Time Nomad.
View on Open VSX
Option 3: Manual Installation
If you prefer to sideload the extension:
- Download the latest
.vsixfile from our Homepage. - In VS Code, run the command "Extensions: Install from VSIX...".
- Select the downloaded file.
2. Authentication
Once installed, you need to link it to your account.
- Click the "Time Nomad" item in your Status Bar (bottom left) or run
Time Nomad: Sign In. - A browser window will open. Click Authorize Extension.
- You'll be redirected back to the IDE, ready to track!
3. Usage
- Start Tracking: Click the status bar item. Select a Client -> Project -> Task.
- Stop Tracking: Click the running timer (colored orange).
- Add Note: Want to add details? Run
Time Nomad: Add Note.
[!TIP]
The extension works offline! If your internet drops, we'll sync your time logs as soon as you're back online.
Project Planner
This is where the magic happens. The Project Planner gives you a bird's-eye view of your entire freelance life. It's not just a calendar—it's your business roadmap.
[!NOTE]
The Project Planner is a PRO feature. Upgrade to Pro Nomad to unlock the advanced Gantt chart, project planning tools, and unlimited history.
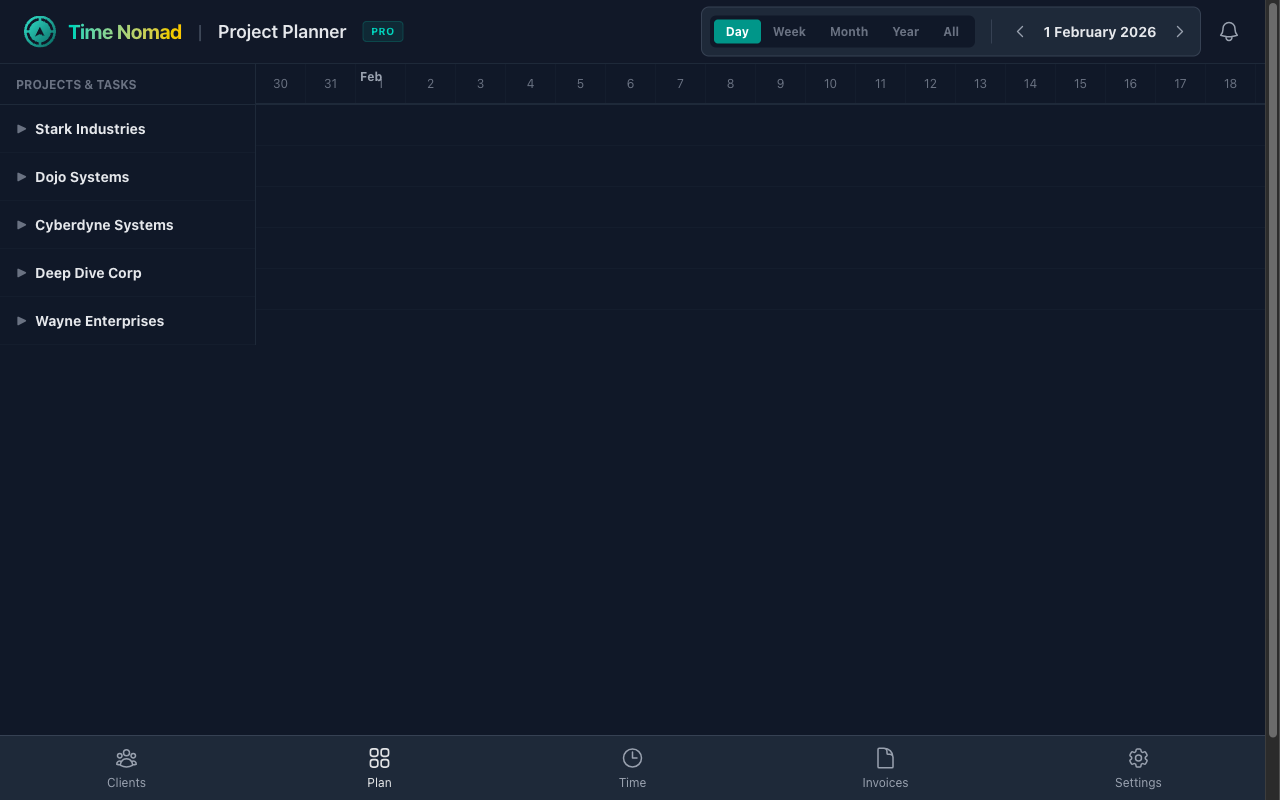
The Project Planner (Gantt Chart)
For those who think big, the Project Planner offers a visual roadmap of your entire workload. It's an interactive Gantt chart that lets you plan weeks or months in advance.
1. Visualizing Your Time
See exactly when projects start and end, and where the gaps are.
- Timeline Grid: Shows projects as bars spanning their duration. The length is calculated based on your budget and daily hours (e.g., a 40-hour project at 4 hours/day spans 10 workdays).
- Drill Down: Click the arrow next to a Client to reveal their Projects. Click a Project to reveal Milestones.
- Real vs. Planned:
- Planned (Colored Bars): Shows your schedule based on budgets.
- Actual (Gray Bars): As you track time, a "Tracked Time" row appears to compare reality against your plan.
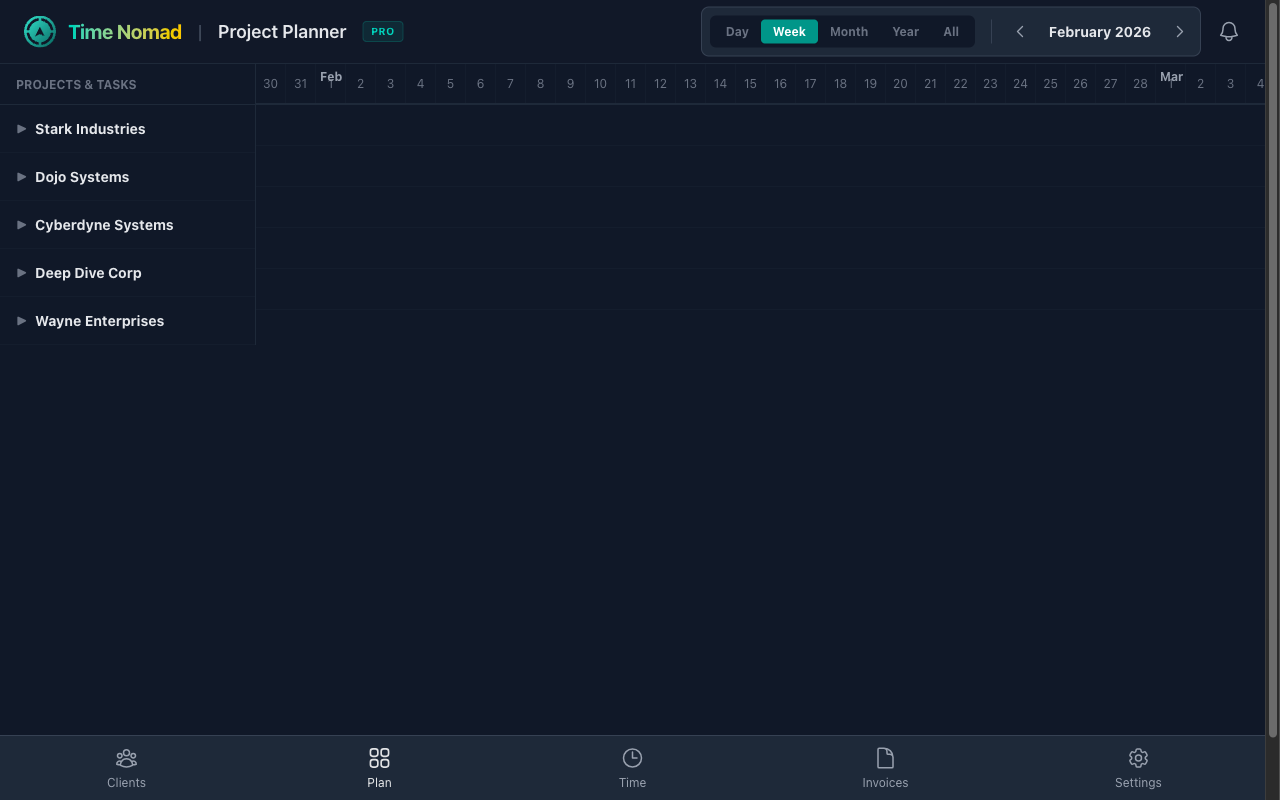
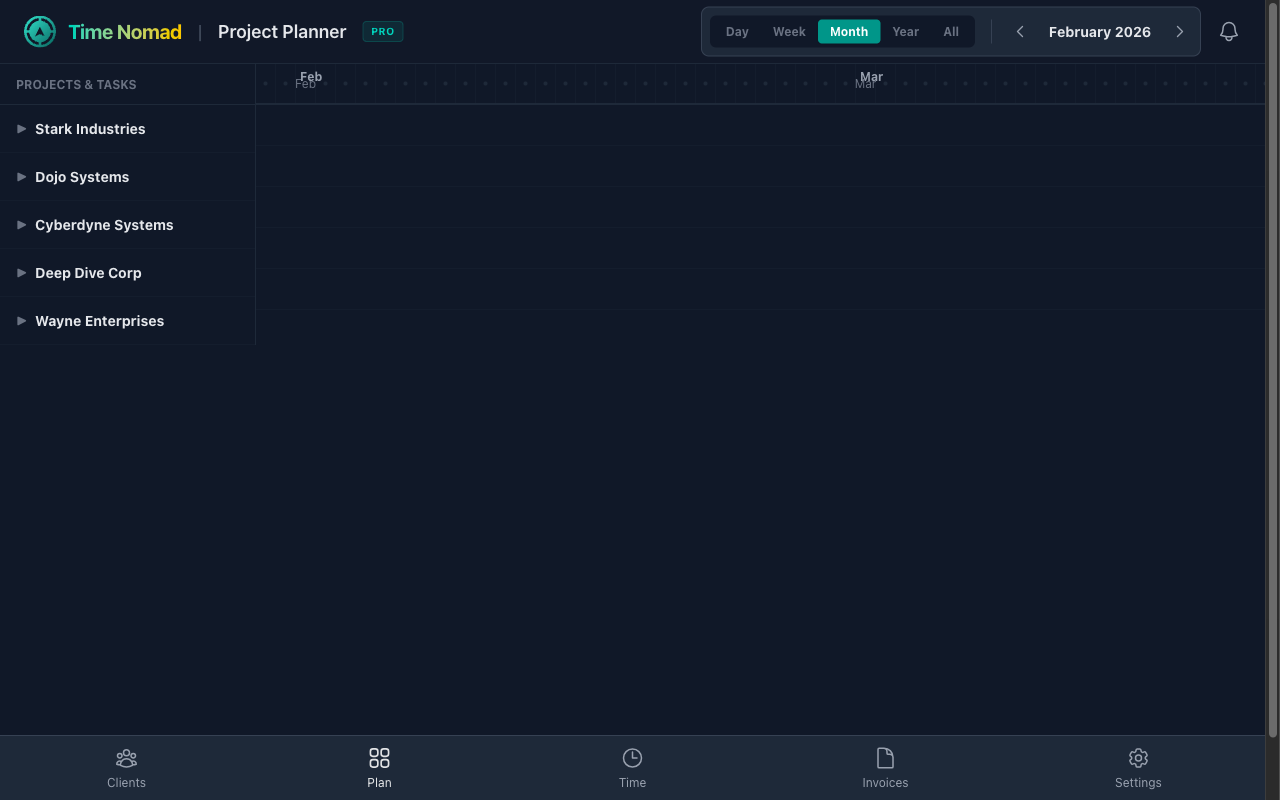
2. Flexible Views for Every Need
Switch perspectives instantly to match your planning horizon.
- Day View: Perfect for detailed scheduling of immediate tasks.

- Week View: The standard view for managing your upcoming sprint or weekly goals.
- Month View: Zoom out to see the big picture and long-term project overlaps.
3. Smart Sidebar
The list on the left isn't just a label—it's a control center.
- Add New Work: Quickly add Clients, Projects, or Milestones directly from the tree view.
- Progress tracking: See total tracked time for each item at a glance.
- Navigation: Clicking a bar on the timeline usually expands it, but clicking an active milestone takes you straight to the Dashboard to start working on it.
- Click to Edit: Click any item in the sidebar to view details or jump to the dashboard with that context selected.
- Add New Work: Hover over a client to add a project, or a project to add a milestone.
Managing Clients & Projects
Time Nomad uses a simple but powerful hierarchy to keep your work organized: Clients > Projects > Milestones.
1. The Hierarchy View
The Clients page is your rolodex. It lists every company you work with.
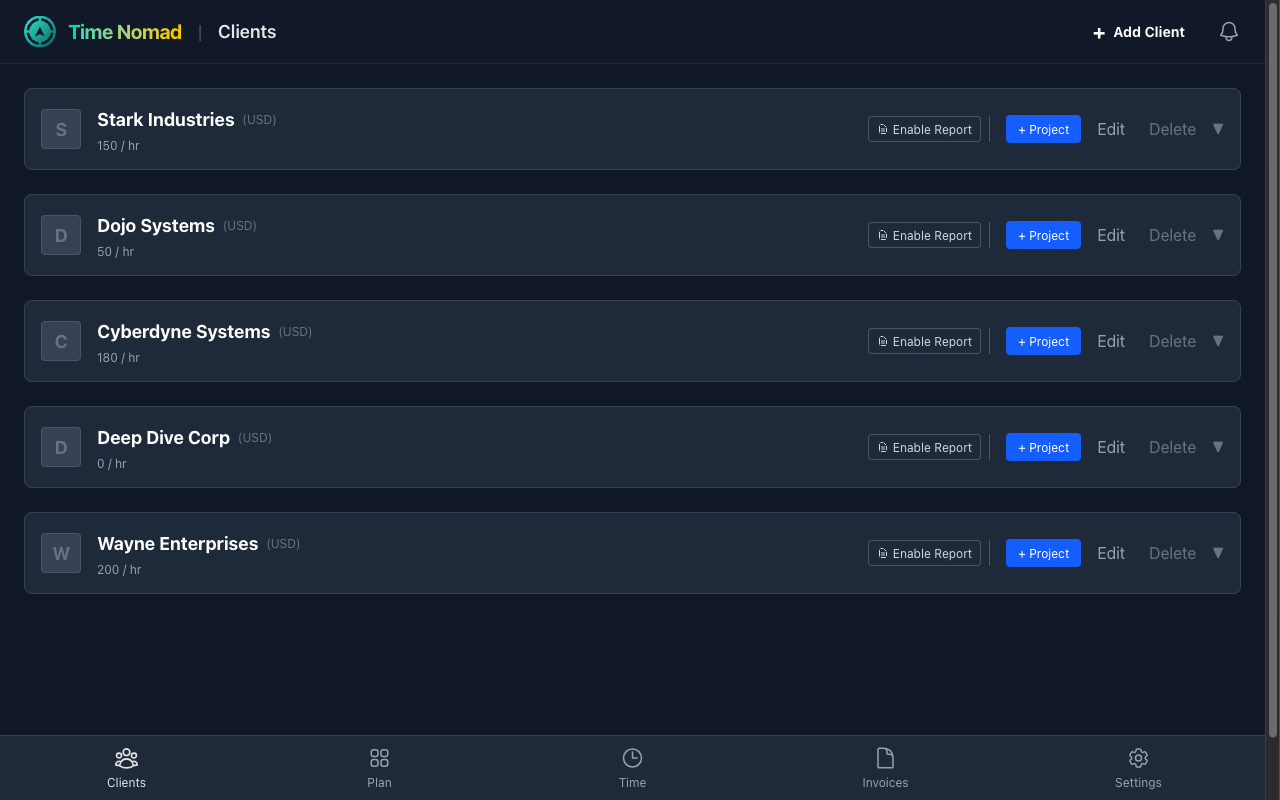
- Clients: The top level. Shows their specific currency and default hourly rate.
- Projects: Click a Client to see their Projects. Projects have a status (Active/Archived) and a total budget.
- Milestones: Click a Project to see specific deliverables (e.g., "Design Phase", "Development").
2. Adding a New Client
Click the + Add Client button in the top right to start a new relationship.
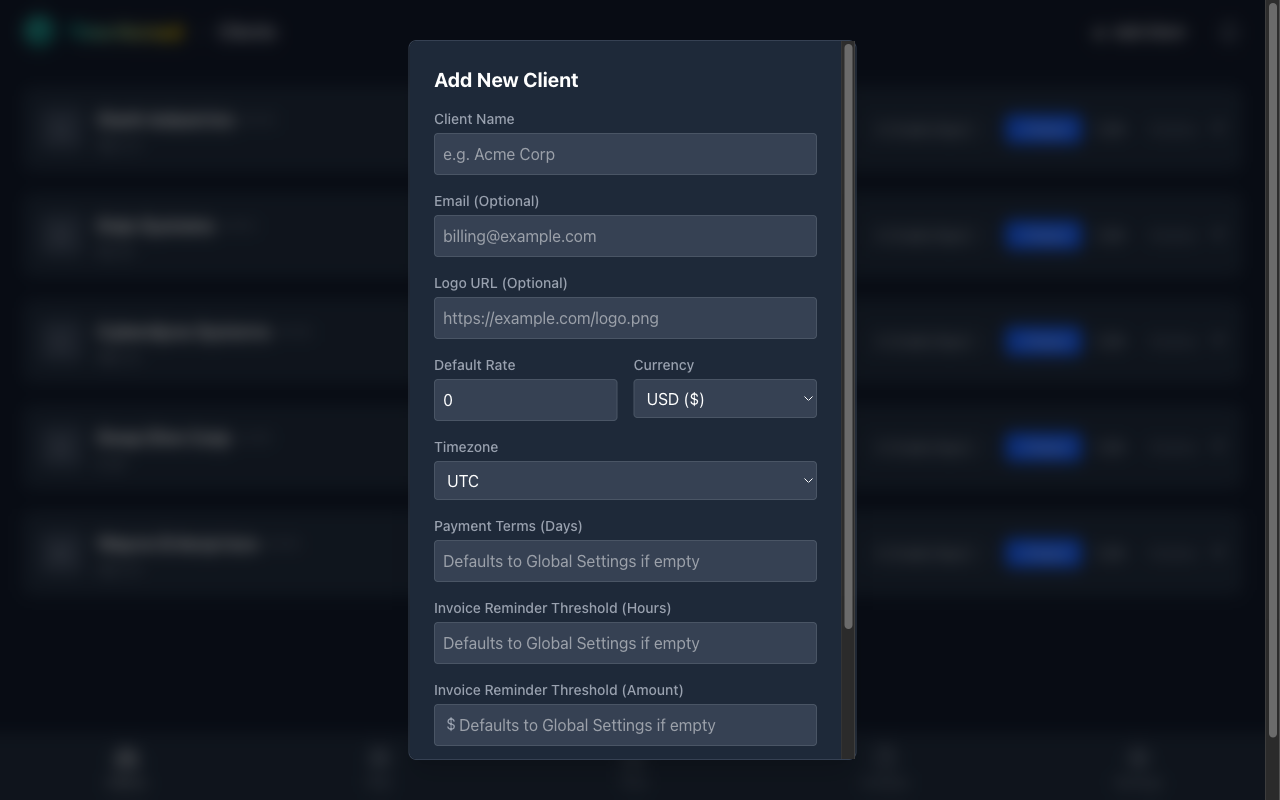
- Default Rate: Set a standard hourly rate for this client. Every new project underneath will inherit this rate (though you can override it later).
- Currency: invoicing in USD, EUR, or GBP? Set it here.
- Logo: Add a URL to their logo to make your dashboard look professional.
3. Managing Work
- Add Project: Click the
+ Projectbutton on any client row. - Add Milestone: Drill down into a project and click
+ Milestone. - Delete: Validating your data? You can delete items, but be careful—deleting a client deletes all their projects and time entries!
Getting Paid: Invoices
Turn your tracked time into revenue with just a few clicks.
1. Generating Invoices
Go to the Invoices tab. You'll see a generator card at the top.
- Select Client: Choose who you are billing.
- Select Period:
- This Month: Automatically grabs all unbilled time from the 1st to the end of the current month.
- Last Month: Grabs everything from the previous month.
- Custom Range: Pick specific start and end dates.
- Generate: Click the button, and Time Nomad calculates the total hours x hourly rate automatically.
2. Preview & Review
Before finalizing, you'll see a preview of the invoice.
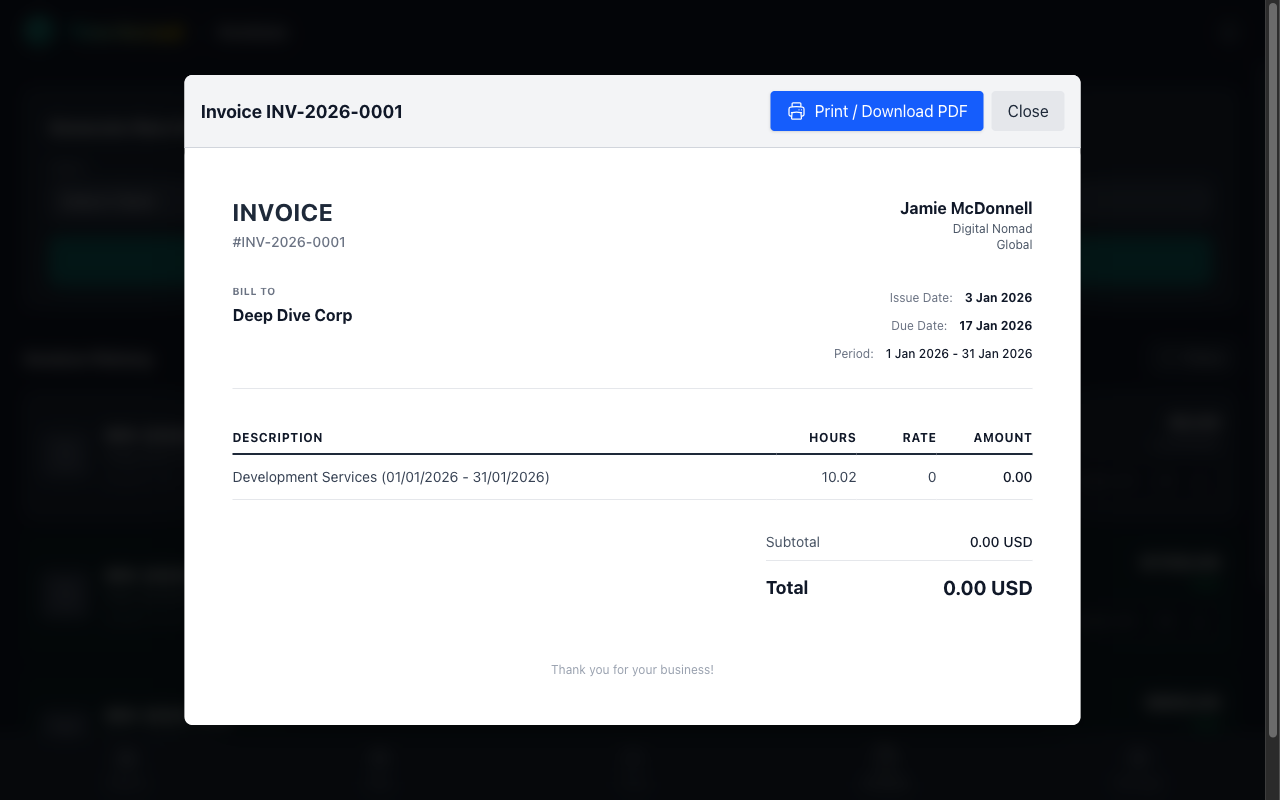
- Itemized List: We group your time entries into a clear line item (e.g., "Development Services"). Fixed-fee entries appear as separate line items.
- Total Amount: Verified against your rate, with adjustments and tax calculated automatically.
- Tax Support: Invoices display the correct tax label (VAT, DPH, GST, etc.) and rate. Tax can be inclusive (amounts include tax, standard for VAT/DPH) or exclusive (tax added on top).
- Payment QR Code: If you've configured bank details in Settings, a scannable QR code appears on the invoice. Your clients can scan it with their banking app to pay instantly — no need to type IBANs manually.
- Terms: Due date is calculated based on your default payment terms (e.g., Net 14).
3. Tracking & History
Once generated, the invoice appears in your history list.
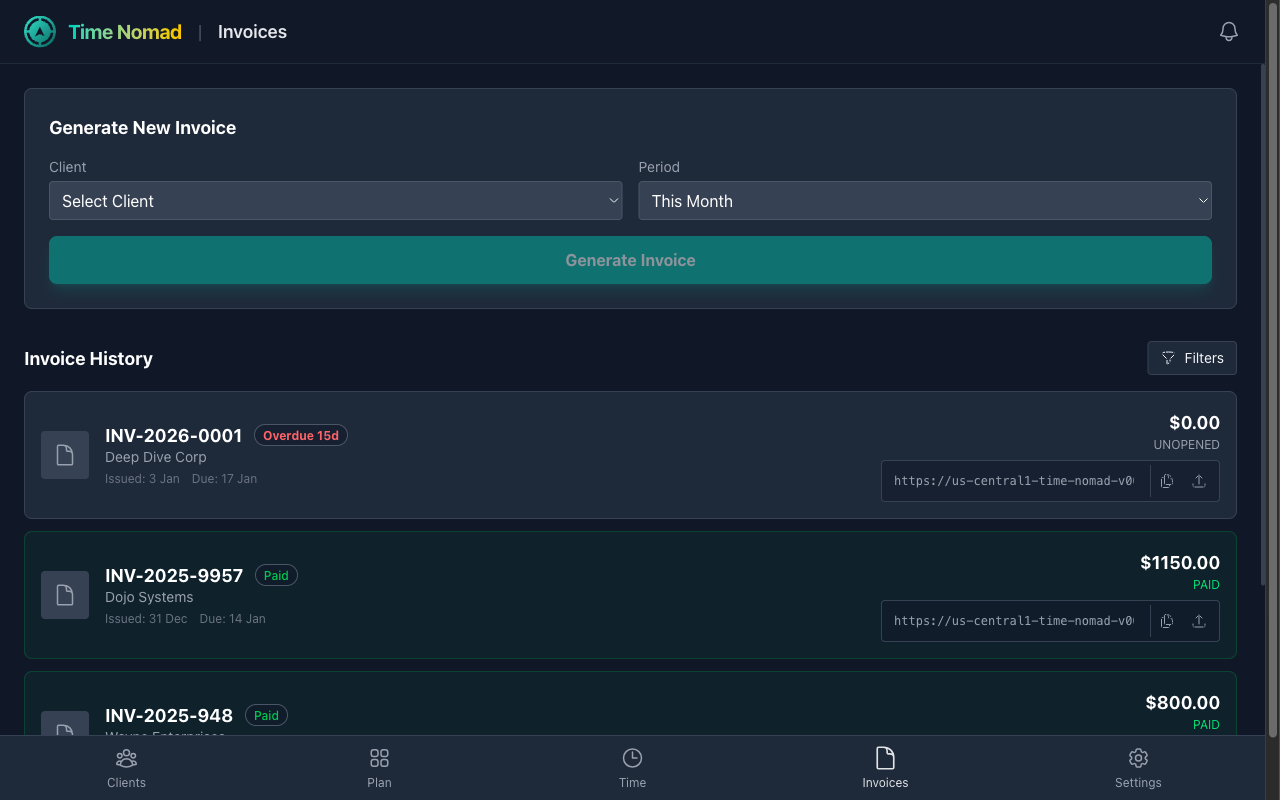
- Status Tracking: Keep tabs on what's
Unopened,Overdue, orPaid. - Smart Links:
- Copy Link: Send this unique URL to your client.
- View Tracking: When a client opens the link, the status automatically updates to
Opened.
- Stripe Integration: Connect your Stripe account in Settings to let clients pay directly via credit card. Clients land on a secure checkout page where they can pay in seconds.
Notifications
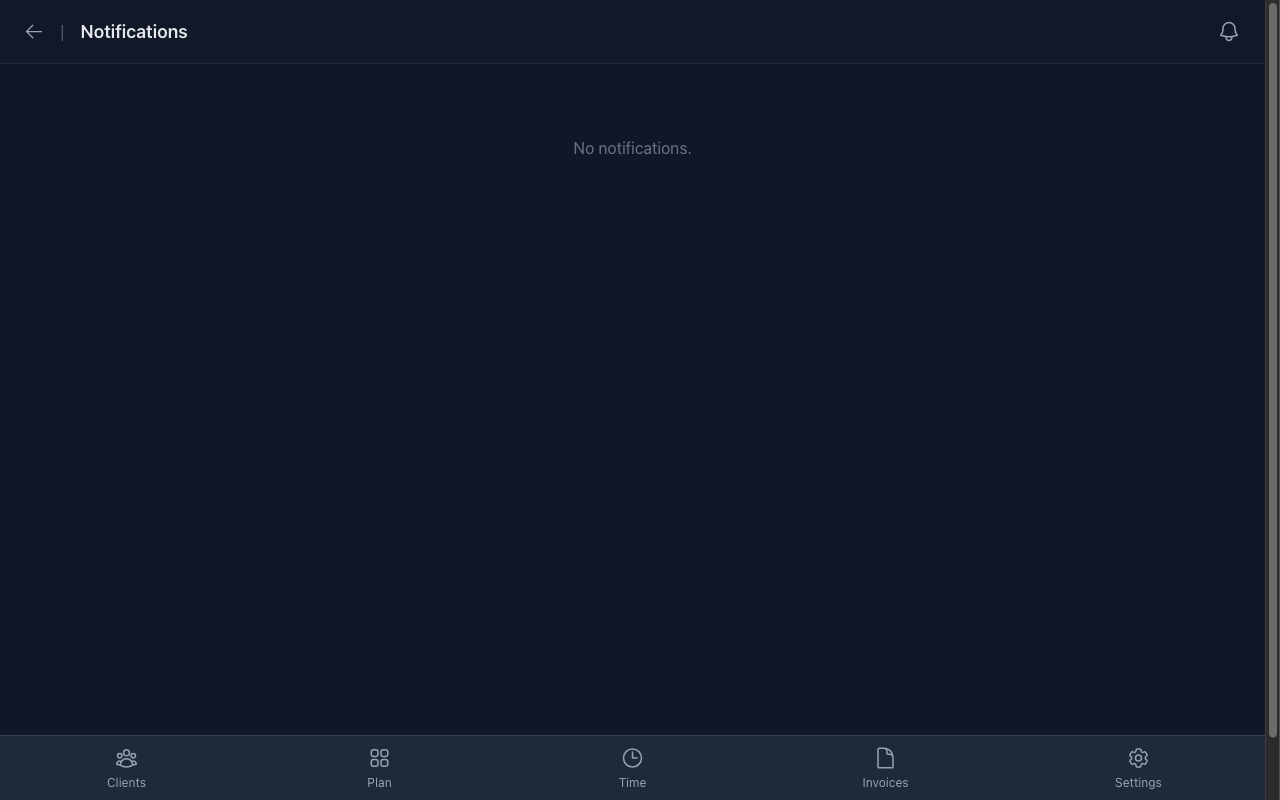
Stay on top of your game without the stress. The Notifications screen is your personal assistant.
Smart Alerts
We don't just tell you what happened; we help you take action.
- Billing Reminders: If you have unbilled hours at the end of the month, we'll nudge you. You can even click "Generate Invoice" right from the notification to get it done in seconds.
- Payment Alerts: Get that dopamine hit when you see "Payment Received" pop up in green.
- Project Updates: Track milestone completions and keeping your timeline healthy.
Configuring Time Nomad
Make Time Nomad work for you. The Settings page helps you customize the app to fit your business.
1. Profile & Branding
Your identity matters.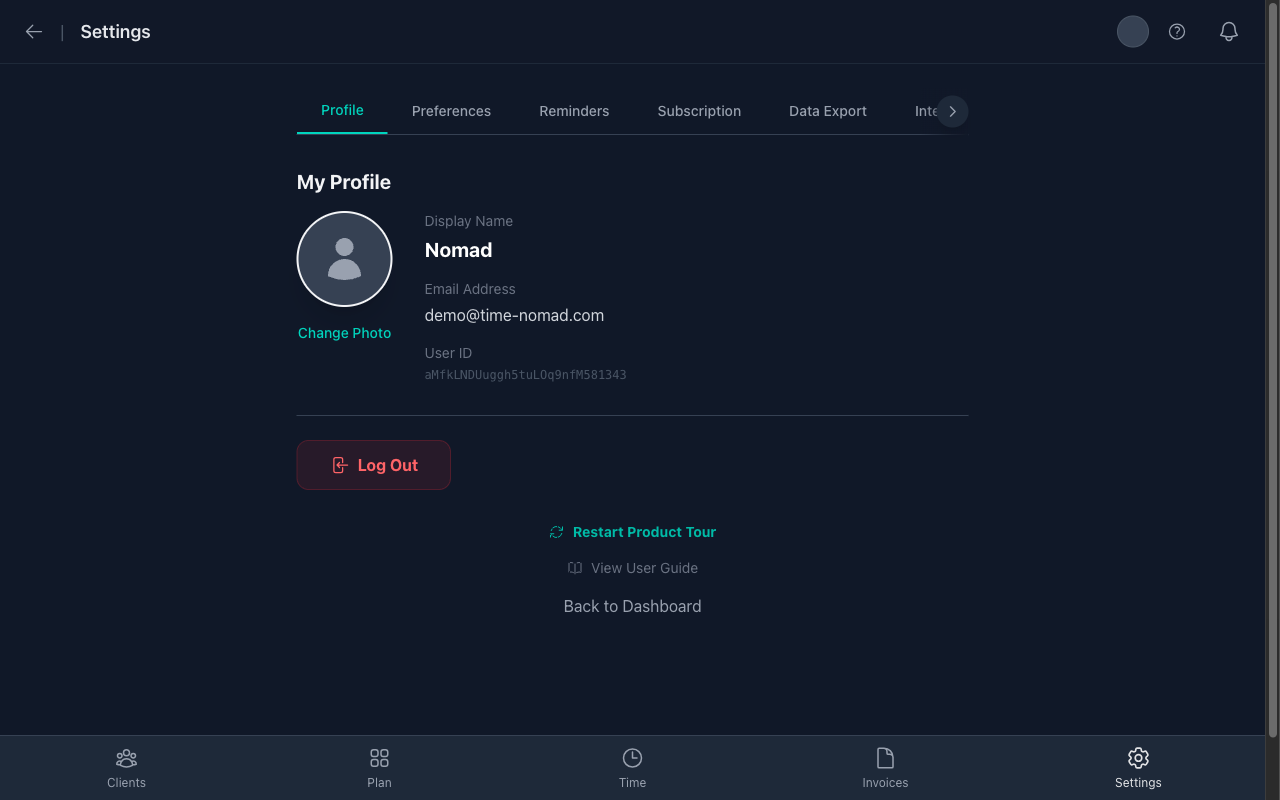
- Upload Photo: Add a professional headshot or company logo. This appears on your internal dashboard.
- Display Name: How you want to be greeted.
2. Invoicing Preferences
Set it and forget it. These defaults apply to every new invoice you create.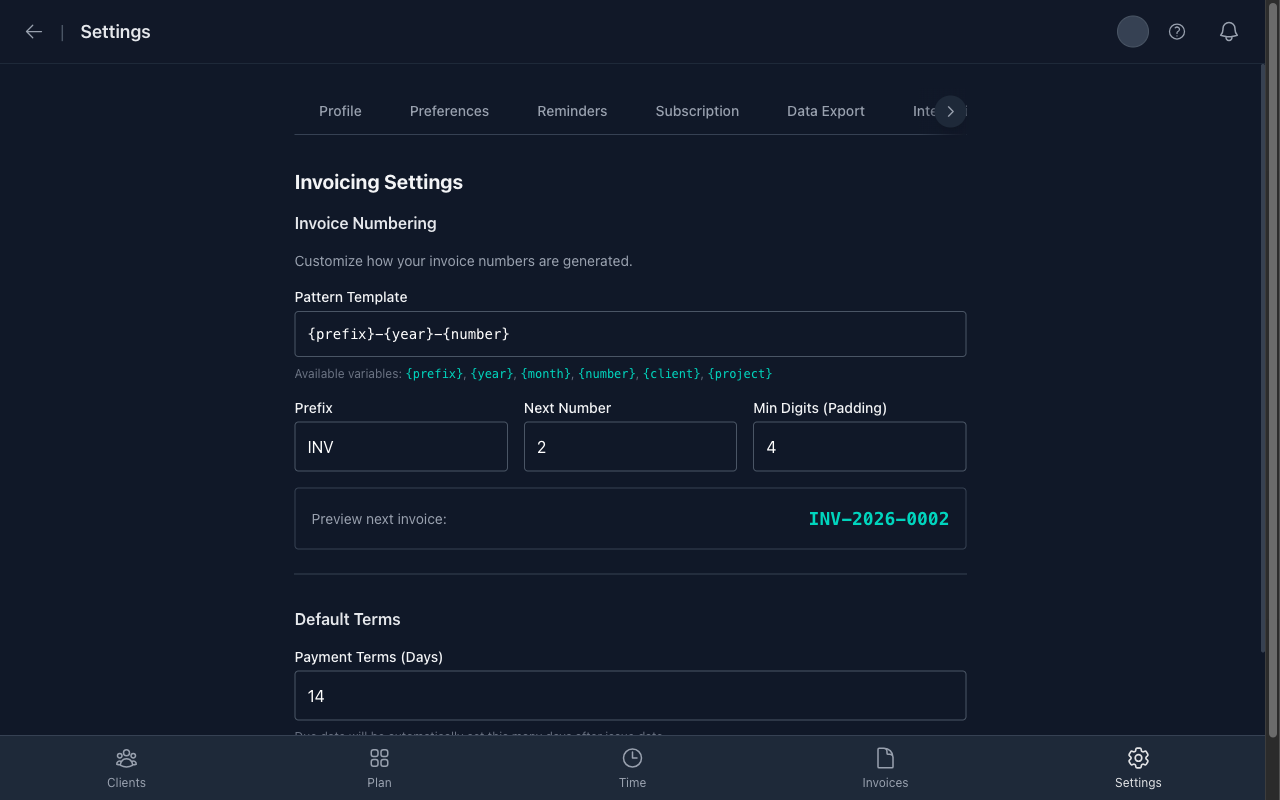
- Invoice Numbering: Customize your pattern (e.g.,
INV-2024-001orACME-001). You can set the prefix, next number, and padding. - Company Details: Set your business name, address, and custom fields (Tax ID, registration number, etc.) that appear on every invoice.
- Bank & Payment Details: Add your bank name, account holder name, IBAN, and BIC/SWIFT. These appear in the invoice footer so clients know where to send payment.
- Payment QR Code: Choose a QR format to add a scannable code to your invoices:
- EPC QR — Works with banking apps across all 36 SEPA countries. Ideal for EUR and international transfers.
- QR Platba (SPAYD) — Czech standard supported by all Czech and Slovak banks. Includes the variable symbol from your invoice number.
- Payment Terms: Set your standard due date period (e.g., 14 days, 30 days).
3. Smart Reminders
Never forget to bill a client again.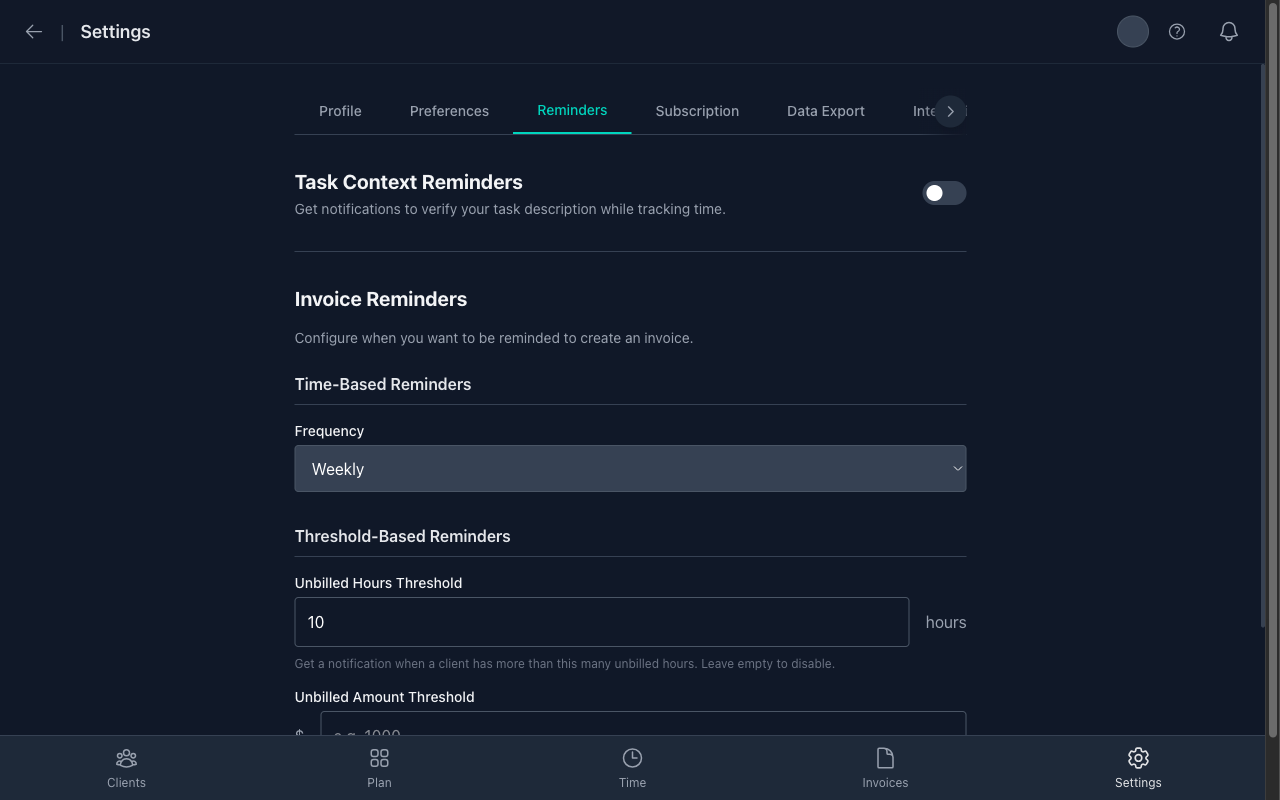
- Unbilled Hours: Get notified if a client accumulates too much time without an invoice (e.g., > 10 hours).
- Cashflow Watch: Get notified if the unbilled amount exceeds a certain value (e.g., > $1,000).
- Frequency: Choose how often Time Nomad checks your accounts (Weekly, Bi-weekly, or Monthly).
4. Stripe Connect
Link your Stripe account in the Integrations tab to enable one-click credit card payments on your invoices. A faster payment method means money in the bank sooner.
5. Data Export
Export your data anytime from the Data Export tab:
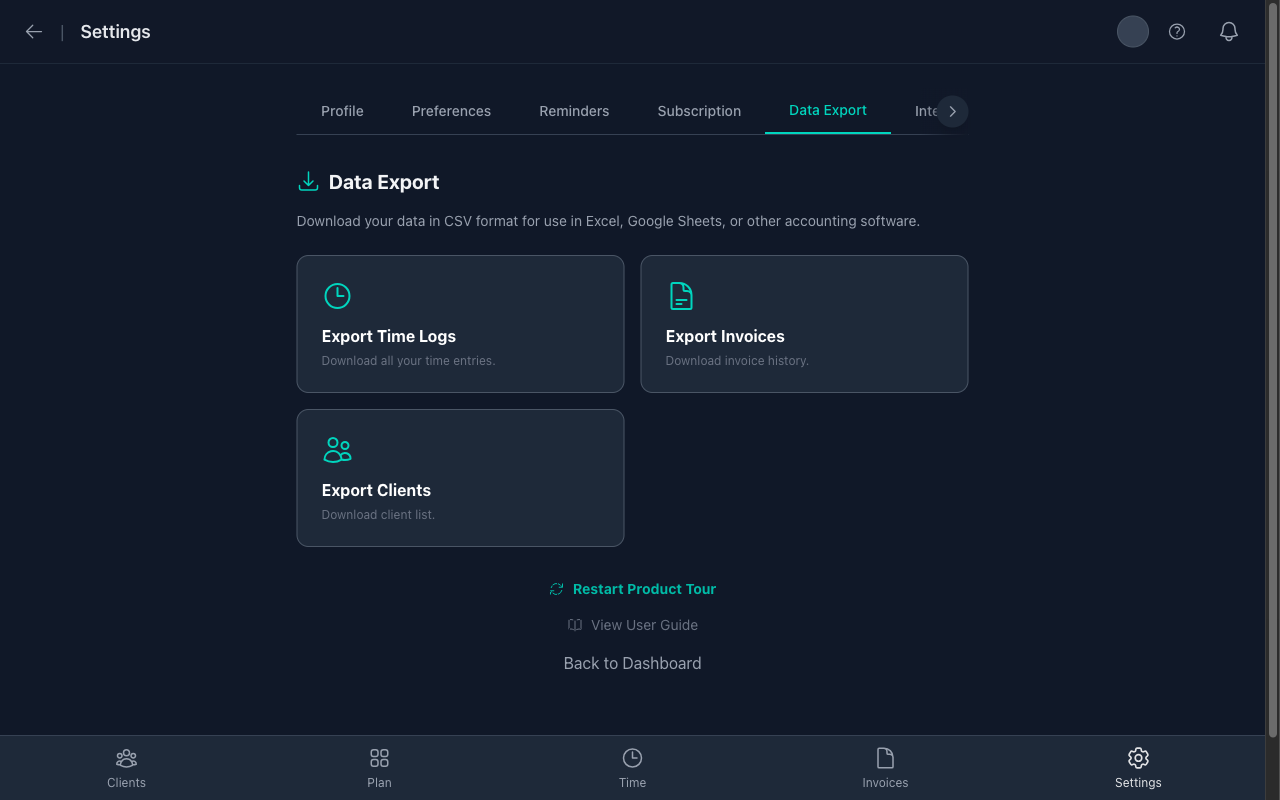
- Export Time Logs: Download all time entries as CSV.
- Export Invoices: Download complete invoice history as CSV.
- Export Clients: Download your client database as CSV.
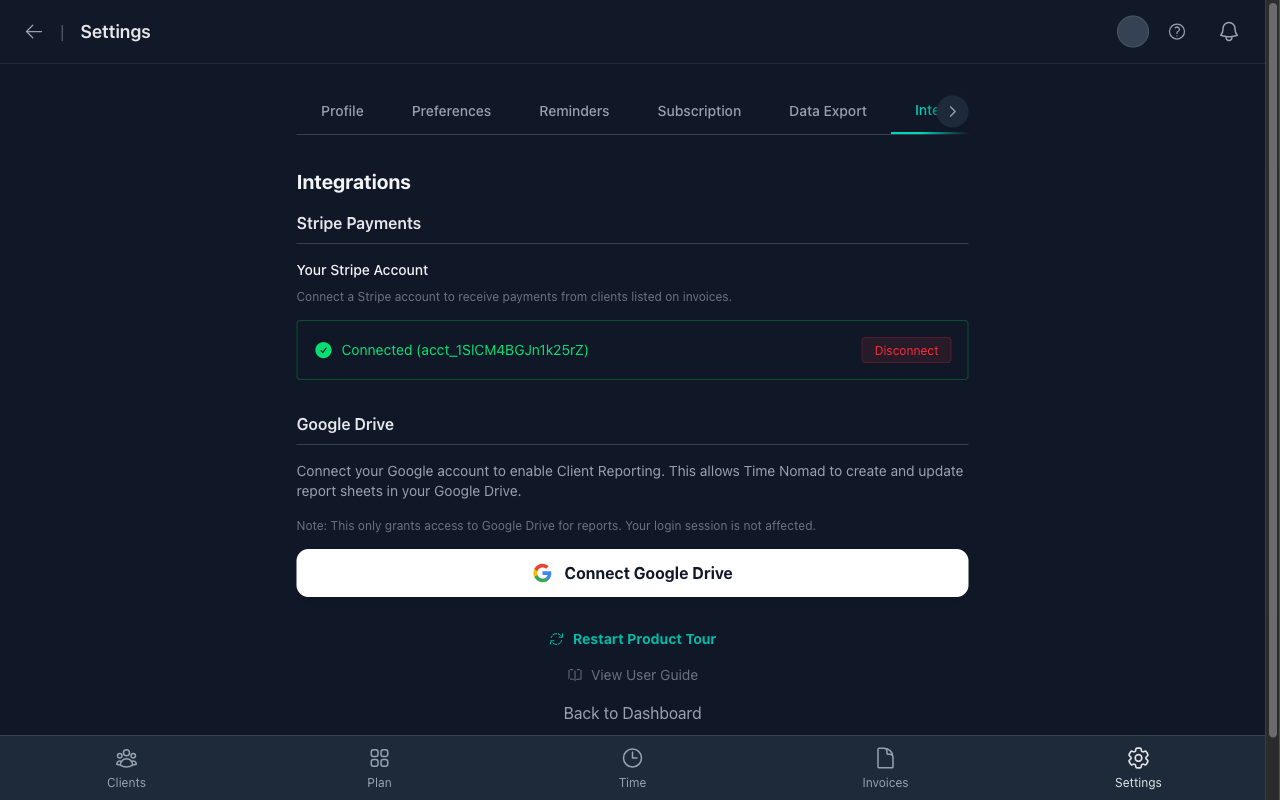
6. Integrations
Connect Time Nomad to your favorite services:
- Stripe Payments: Accept credit card payments directly on invoices.
- Google Drive: Enable client reporting with automated Google Sheets.
7. Preferences
Customize how Time Nomad works for you:
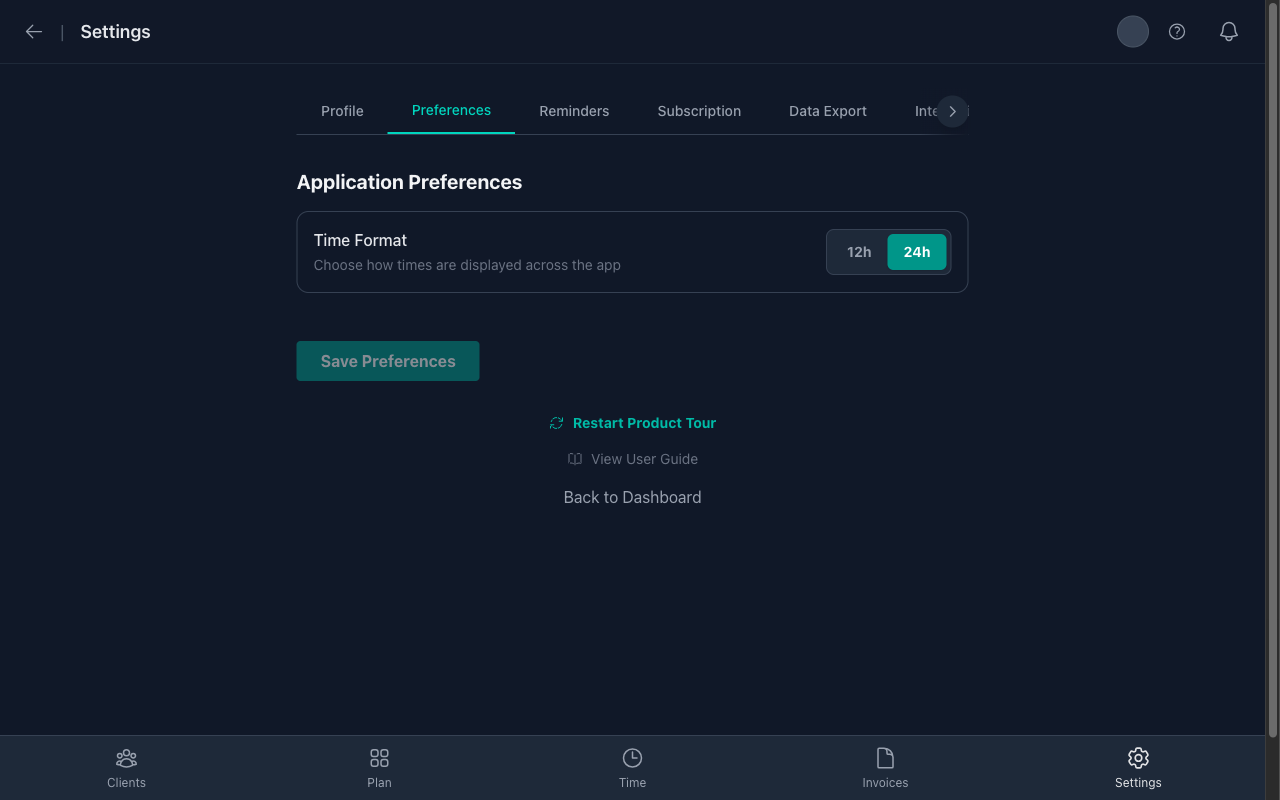
- Time Format: Toggle between 12-hour and 24-hour time display.
8. Subscription
Manage your plan from the Subscription tab:
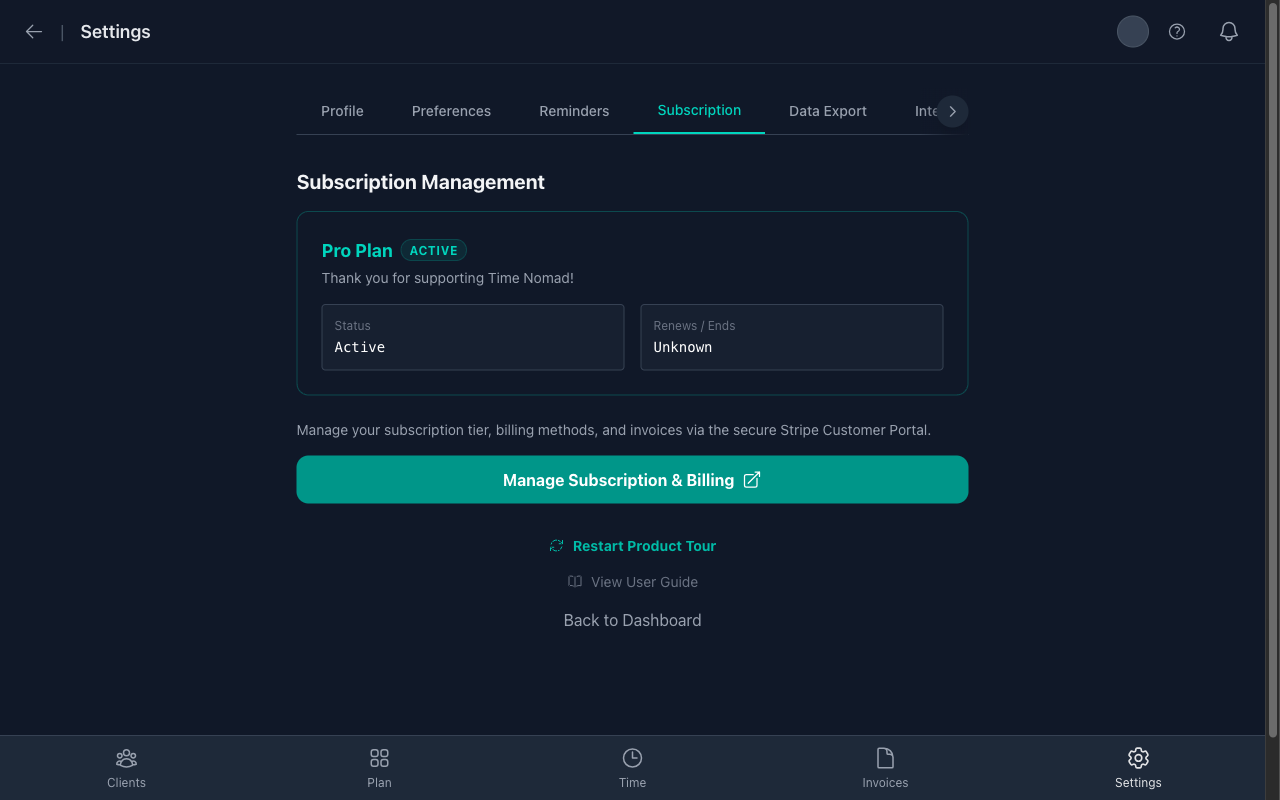
- View your current plan (Free, Pro, or Business).
- Upgrade to unlock advanced features like the Project Planner and invoice filtering.
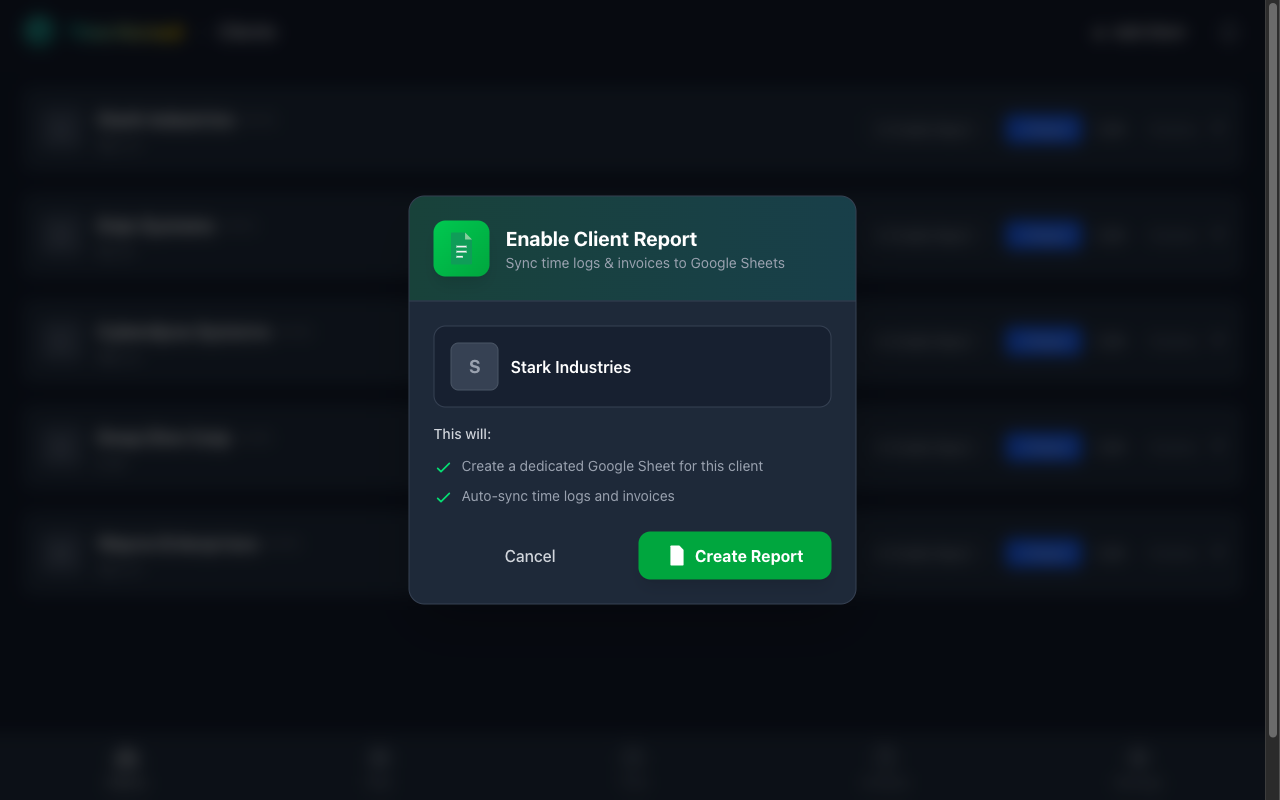
Client Reporting (Pro)
Keep your clients in the loop effortlessy with automated Google Sheet reports.
Instead of manually exporting CSVs or sending weekly updates, Time Nomad can create a live Google Sheet for each client that syncs automatically in the background.
Enabling Reports
- Go to the Clients page.
- Open a Client's details.
- Click the Enable Report button directly in the client header.
- Authorize Google Access (if you haven't already).
What the Client Sees
A shared Google Sheet with three tabs:
- Summary: Total hours logged, total amount billed, and outstanding balance breakdown.
- Time Logs: A complete list of every time entry, live-synced as you track.
- Invoices: A history of all invoices sent to them.
[!TIP]
This is a set-and-forget feature. Once enabled, every time you stop a timer or create an invoice, the sheet updates within seconds. You can share the link with your client once, and they'll always have an up-to-date view of your work.
Data Export
Your data belongs to you. Time Nomad makes it easy to export everything at any time.
Available Exports
Navigate to Settings > Data Export to find these options:
| Export Type | Contents | Format |
|---|---|---|
| Time Logs | All tracked time entries with client, project, dates, and durations | CSV |
| Invoices | Complete invoice history with amounts, statuses, and dates | CSV |
| Clients | Your client database including rates, currencies, and contact info | CSV |
[!NOTE]
Exports include all historical data, not just the current period. Perfect for annual tax prep or switching accounting software.
Referral Program
Share Time Nomad with friends and earn commission discounts!
How It Works
- Invite Friends: Go to Settings > Referrals and enter your friends' email addresses.
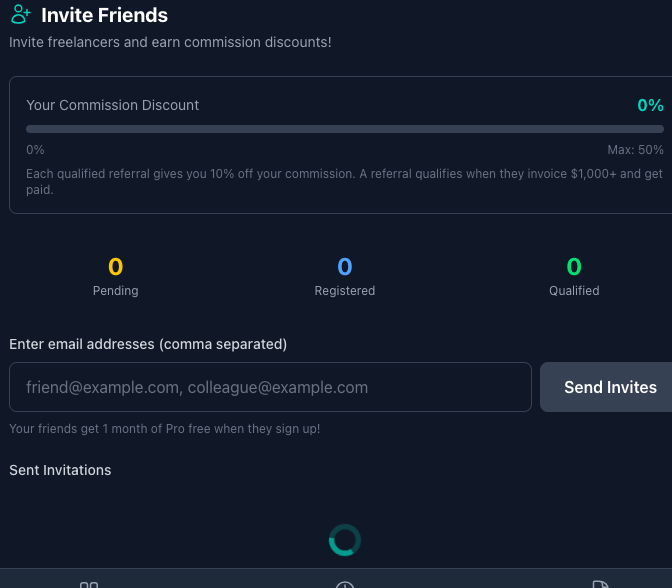
2. They Sign Up: Your friend receives an invitation email with a unique referral link.
3. They Get Pro Free: When they sign up, they automatically receive 1 month of Pro for free!
4. You Earn Discounts: When your referral becomes a paying customer (invoices $1,000+), you earn commission discounts.
Your Rewards
| Qualified Referrals | Your Commission Discount |
|---|---|
| 1 | 10% |
| 2 | 20% |
| 3 | 30% |
| 4 | 40% |
| 5+ | 50% (Maximum) |
Tracking Your Referrals
The Referrals tab shows your progress:
- Pending: Invitation sent but not yet signed up.
- Registered: Friend signed up and is using Time Nomad.
- Qualified: Friend has invoiced $1,000+ and you've earned your discount!
[!TIP]
You can send up to 10 invitations per day. Make sure your friends use the link in the email—that's how we track your referral!
Pro Features
Upgrade to Pro or Business to unlock powerful features:
| Feature | Free | Pro | Business |
|---|---|---|---|
| Time Tracking | ✅ | ✅ | ✅ |
| Unlimited Clients & Projects | ✅ | ✅ | ✅ |
| Invoice Generation (QR Codes, Tax, Multi-Currency) | ✅ | ✅ | ✅ |
| Client Reporting (Google Sheets) | ✅ | ✅ | ✅ |
| Project Planner (Gantt Chart) | ❌ | ✅ | ✅ |
| Invoice Filtering | ❌ | ✅ | ✅ |
| Smart Reminders | ❌ | ✅ | ✅ |
| Commission Rate | 5% | 3% | 1% |
| Priority Support | ❌ | ✅ | ✅ |
Ticket Integrations
Link your time entries directly to your development workflow. Time Nomad supports Shortcut, Linear, and Asana.
Shortcut Integration
To connect Shortcut, you need a Personal Access Token (API Token).
- Log in to your Shortcut account.
- Click on your profile picture in the bottom left corner and select Settings.
- Navigate to My Account > API Tokens.
- Enter a name for the token (e.g., "Time Nomad") and click Generate Token.
- Copy the token immediately. This is the only time it will be visible.
- Paste the token into Time Nomad > Settings > Integrations > Shortcut API Token.
Linear Integration
Connecting to Linear is simple and secure.
- Go to Time Nomad > Settings > Integrations.
- Click Connect with Linear.
- A pop-up window will appear asking you to authorize Time Nomad.
- Click Authorize.
- Once successful, the button will change to "Connected" and display your Linear profile name.
Asana Integration
Connect your Asana workspace to track time against tasks.
- Go to Time Nomad > Settings > Integrations.
- Click Connect with Asana.
- Authorize Time Nomad to access your tasks.
- You're all set! Your assigned tasks will now appear in the Ticket Selector.
Ready to get started? Return to Dashboard and start tracking your first minute of freedom!
© 2026 Time Nomad. All rights reserved.