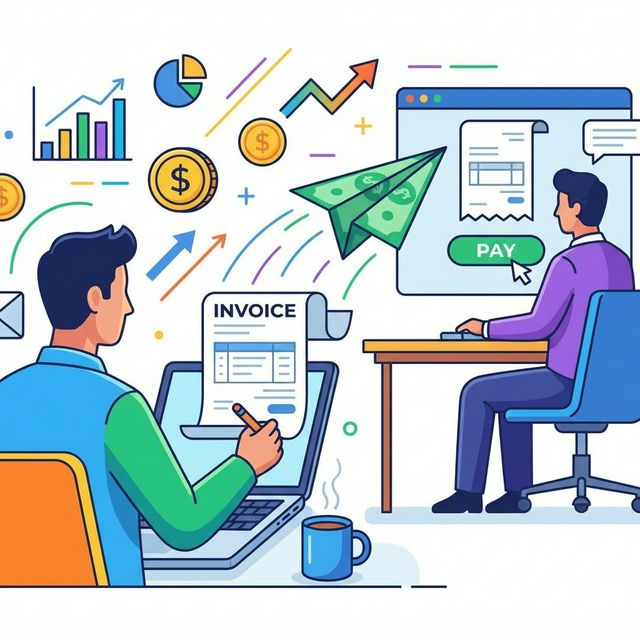
Sending your first invoice as a freelancer feels like a milestone — because it is. It's the moment your work officially becomes a business transaction. But unlike a shop where the price is on the tag and the payment happens at the register, freelance invoicing requires you to define the terms, document the work, and make it easy for the client to pay.
Getting this right matters. A clear, professional invoice gets paid faster. A vague or incomplete one raises questions, triggers back-and-forth emails, and pushes your payment date further out. This guide walks through every element of a freelance invoice, the mistakes that cost people money, and how to automate the process so invoicing takes minutes instead of an hour.
What Every Freelance Invoice Must Include
There are legal requirements in most jurisdictions, and then there are practical elements that make invoices work smoothly. Here's the complete list.
Your Business Details
At the top of every invoice:
- Your name or business name: The legal entity providing the service.
- Your address: Required for tax compliance in most countries. If you're a digital nomad, use your registered business address.
- Email and phone: So the client's accounts payable department can reach you if there's a question.
- Tax ID / VAT number: Required in many jurisdictions. If you're registered for VAT or GST, this must appear on every invoice.
Client Details
- Client's name or company name: The legal entity being billed.
- Client's address: Particularly important for international invoicing and tax purposes.
- Billing contact: If your day-to-day contact isn't the person who processes invoices, include the billing contact's name and email.
Invoice Identifiers
- Invoice number: A unique, sequential identifier. Your first invoice might be INV-001 or TN-2026-001 — the format doesn't matter as long as it's consistent and never repeated. Most invoicing tools handle this automatically.
- Invoice date: The date you're issuing the invoice.
- Due date: When payment is expected. Common terms are Net 15, Net 30, or Due on Receipt. Be explicit — "Due within 30 days" is clearer than "Net 30" for clients who aren't familiar with billing terminology.
Line Items
This is the core of your invoice and the part that matters most for clarity. Each line item should include:
| Field | Example |
|---|---|
| Description | Website redesign — homepage and about page |
| Quantity | 12.5 hours |
| Rate | $95.00/hr |
| Amount | $1,187.50 |
Be specific with descriptions. "Web development" tells your client nothing. "Frontend development — responsive layout for product catalog pages, Feb 1–14" tells them exactly what they're paying for. Specific descriptions reduce questions and disputes.
Group logically. If you worked on three distinct areas of a project, create three line items rather than one lump entry. This gives the client visibility into where their budget went and makes your invoice look more professional.
Totals
- Subtotal: Sum of all line items.
- Tax: If applicable. Include the tax rate and amount.
- Discount: If you've agreed to one. Show it as a separate line.
- Total due: The final amount in bold, unmissable.
- Currency: Stated explicitly, especially for international clients. Don't assume — write "Total: USD $1,425.00" not just "$1,425.00."
Payment Information
This is where too many freelancers drop the ball. Your invoice should include clear, actionable payment instructions:
- Bank transfer details: Bank name, account number, routing/sort code, SWIFT/BIC for international transfers.
- Payment link: If your invoicing tool supports it, include a direct "Pay Now" link for card or bank payments. This single addition can reduce your average payment time significantly.
- PayPal or other payment method: If accepted, include the relevant email or link.
- Payment terms: Restate the due date and any late payment policy. For example: "Payment due by March 15, 2026. A 2% monthly fee applies to overdue balances."
Step-by-Step: Creating a Freelance Invoice
Let's walk through the actual process, from gathering your data to hitting send.
Step 1: Gather Your Time and Deliverable Data
Before opening your invoicing tool, you need to know what you're billing for. This is either:
- Tracked hours: If you've been tracking time throughout the billing period, pull your time report filtered by client and date range. If you're using a tool like Time Nomad, this data is already organized by project and ready to convert.
- Deliverables: For fixed-price work, list the deliverables completed in this billing period with their agreed prices.
- Expenses: Any reimbursable expenses (stock photos, software licenses, travel) should be documented with receipts.
If you're still tracking time in spreadsheets, this step alone can take 20–30 minutes of reconciliation. That's one of the strongest arguments for moving to an integrated tracking and invoicing setup — our guide on combined tools explains why.
Step 2: Create the Invoice
Open your invoicing tool and start a new invoice. Fill in:
- Select or enter the client.
- Set the invoice date (today) and due date (based on your agreed terms).
- Add your line items from the data gathered in Step 1.
- Apply tax if required.
- Double-check the currency.
With Time Nomad, Steps 1–3 can be automated: select the client, choose the date range, and the tool populates your line items directly from your tracked time entries. You review, adjust if needed, and move to Step 3.
Step 3: Review Before Sending
This step takes two minutes and prevents the most common invoicing errors. Check:
- Is the client name and address correct?
- Is the invoice number sequential (not a duplicate)?
- Do the line item descriptions accurately reflect the work?
- Is the math correct?
- Is the currency correct?
- Are your payment details included?
- Is the due date realistic and consistent with your agreed terms?
Step 4: Send the Invoice
Email the invoice as a PDF attachment or use your tool's built-in sending feature. Include a brief, professional email:
Hi [Name],
Please find attached invoice #TN-2026-014 for [project name], covering work completed in February 2026.
The total is $2,850.00 USD, due by March 15, 2026. Payment can be made via the link in the invoice or by bank transfer using the details provided.
Let me know if you have any questions.
Step 5: Track and Follow Up
Mark the invoice as sent in your system. If it's not paid by the due date, send a polite reminder. If it's 7 days overdue, send a firmer one. If it's 14+ days overdue, pick up the phone.
Most invoicing tools can automate reminders. Use them. It's not rude to remind clients about payment — it's professional.
Common Invoicing Mistakes That Delay Payment
Vague Line Item Descriptions
"Consulting — February" invites scrutiny. "Strategic planning sessions (4 x 1hr) and competitive analysis report, Feb 3–14" does not. Specificity builds trust and reduces questions.
No Payment Terms
If your invoice doesn't state when payment is due, the client decides — and their timeline is always longer than yours. Always include a due date. Net 30 is common for corporate clients; Net 15 or Due on Receipt is reasonable for smaller clients and one-off projects.
Wrong or Missing Currency
Invoicing a London client in dollars or a New York client in pounds creates confusion and delays while they confirm the correct amount. State the currency clearly and confirm it in your contract before the first invoice.
Sending to the Wrong Person
Your project contact and the person who processes payments are often different people. Ask early: "Who should I send invoices to?" Send directly to that person with your project contact CC'd.
Not Including Payment Instructions
An invoice that says "please pay" without explaining how sits in someone's inbox until they email you for bank details. Include complete payment information on every invoice.
Inconsistent Invoice Numbering
Skipping from INV-012 to INV-015 raises flags with accounting departments. Use sequential numbering and let your tool manage it.
Automating Invoice Creation from Tracked Time
The most time-consuming part of freelance invoicing isn't the invoice itself — it's assembling the data that goes into it. When your time tracking and invoicing live in the same system, that assembly step disappears.
Here's what the automated workflow looks like in practice:
- Track time throughout the month using one-click timers or manual entries, tagged to clients and projects.
- At month's end, open the invoicing view and select the client.
- Choose the billing period (e.g., February 1–28, 2026).
- Review the auto-generated line items: your tracked entries are grouped by project, with descriptions, hours, and rates already filled in.
- Adjust if needed: combine entries that should be one line item, add fixed-price items, apply discounts.
- Send.
Total time: 3–5 minutes per client. Compare that to the 20–40 minutes it takes to manually compile time data, calculate totals, and type line items into a separate invoicing tool.
The accuracy benefit is just as important as the time saving. When line items are generated directly from tracked time, there's no transcription error, no forgotten entries, and no math mistakes. Your invoice reflects exactly what you tracked. For freelancers interested in this approach, we cover the core principles in our freelance time tracking guide.
Setting Up for Faster Payments
A few practices that consistently reduce the time between sending an invoice and receiving payment:
- Use a consistent template: A recognizable format helps clients' accounts payable teams process your invoices quickly. Our guide to the perfect freelancer invoice covers template design.
- Include a payment link: Clients who can click and pay do so much faster than clients who need to set up a bank transfer.
- Invoice promptly: Send invoices within a day or two of the work being completed or the billing period ending.
- Automate reminders: Set your tool to send a reminder 3 days before the due date and another on the due date itself.
For more strategies on shortening your payment cycle, see our guide on getting paid faster.
Start Invoicing with Confidence
Freelance invoicing doesn't need to be complicated. The fundamentals — clear details, specific line items, explicit payment terms, and prompt delivery — cover 90% of what matters. The remaining 10% is efficiency: automating the repetitive parts so invoicing takes minutes, not hours.
Whether you're sending your first invoice or your five hundredth, Time Nomad connects your tracked time directly to your invoices. Track your hours, click to generate, review, and send. It's the shortest path from work completed to payment requested — try it on your next billing cycle.
Jamie McDonnell
Writing about freelancing, productivity, and the tools that help independent professionals do their best work.
Related Posts
The Perfect Freelancer Invoice: Every Element Explained
A complete breakdown of every element on a professional freelancer invoice — what to include, why it matters, and what each section communicates to your client.
What to Look for in an Invoice System: A First-Timer's Checklist
Evaluating invoice systems for the first time? This checklist covers cloud vs. desktop, payment processing, data portability, red flags, and the features that actually matter for freelancers and small businesses.
Time Tracking and Invoicing for Freelancers: Why One App Beats Two
Using separate tools for time tracking and invoicing creates billing errors, wasted admin time, and reconciliation headaches. Here's the case for combining both in a single app — and what to look for.
Stay in the loop
Get freelancing tips, product updates, and productivity insights delivered to your inbox.
No spam. Unsubscribe anytime.